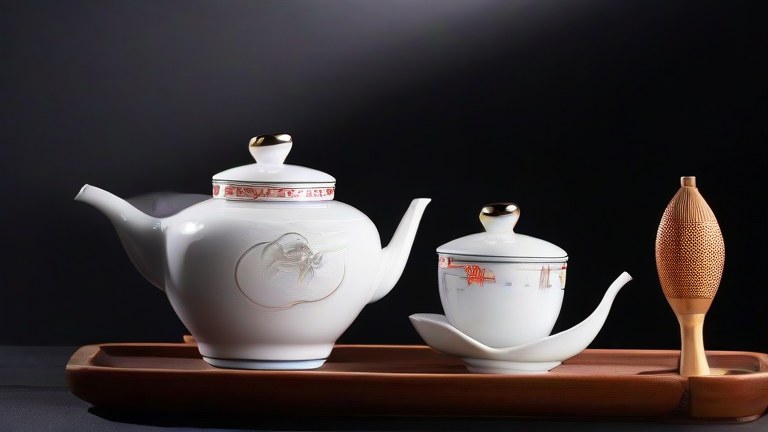
TL;DR: To set up a porcelain tea set, arrange the teapot, cups, and tray in a balanced formation while ensuring all pieces are dry and clean. For long-term care, rinse the teapot immediately after use, let it air dry completely, and store it loosely assembled to prevent moisture buildup and breakage.
Step 1: Unpacking and Initial Inspection
Before your first brew, carefully unbox your porcelain tea set. Porcelain is delicate, so handle each piece with clean, dry hands to avoid transferring oils or causing minor scratches. Inspect the teapot, cups, and saucers for any manufacturing defects, chips, or hairline cracks. Check the spout alignment and ensure the lid fits snugly but allows for easy lifting. If the set includes a tray, verify that its surface is smooth and free from rough edges that could scratch the porcelain. This initial inspection ensures you know the baseline condition of your items, making it easier to identify any future damage. Keep the original packaging materials if possible, as they often provide excellent cushioning for future storage or transport. Taking a few minutes here prevents minor issues from becoming major problems later.
If you want to dig deeper, check out our guide on Luxury Porcelain Teapots: Top 10 Tea Sets for Your Business.
Step 2: The First Rinse and Seasoning
New porcelain pieces may carry a faint factory smell or dust residue. To eliminate this, wash the entire set with warm water and a mild, unscented soap. Avoid using abrasive sponges, as they can dull the glossy finish of the porcelain. After washing, rinse thoroughly to remove all soap traces. For the teapot specifically, perform a “seasoning” rinse. Boil water and pour it into the empty teapot, swirling it around to coat the interior walls before discarding the water. This process opens the pores of the clay (if it is a porous porcelain blend) and removes any remaining kiln dust. It also warms the pot, which is essential for maintaining the optimal temperature of your first tea infusion. Repeat this process once more to ensure the pot is neutral and ready for flavor extraction.
Step 3: Arranging the Tea Set
Proper arrangement enhances both the aesthetics and functionality of your tea ceremony. Place the serving tray on a stable, heat-resistant surface. Center the porcelain teapot on the tray, ensuring it sits securely without wobbling. Arrange the teacups and saucers in a symmetrical pattern around the teapot. If the set includes a pitcher or strainer, place them within easy reach but out of the way to prevent accidental knocking. Consider the flow of movement; the spout of the teapot should face the direction where you will be pouring. Keep the teapot lid nearby but not on top if you plan to open it frequently during brewing. A well-organized set reduces clutter and allows for a smooth, graceful pouring motion, which is crucial for appreciating the visual appeal of porcelain tea sets.
Step 4: Brewing with Precision
When ready to brew, preheat your cups by pouring hot water into them, swirling, and discarding the liquid. This prevents the shock of hot tea on cold porcelain, which can sometimes cause thermal stress. Measure your tea leaves accurately; porcelain teapots often have a specific capacity, so avoid overfilling, as this can block the spout. Use water at the correct temperature for your specific tea type. For green teas, use lower temperatures to avoid bitterness, while oolongs and blacks can handle higher heat. Pour the water steadily into the teapot, ensuring the leaves are fully saturated. Let the tea steep for the recommended time. When pouring, lift the teapot by the handle with a firm grip, keeping your wrist steady to control the flow of the liquid into the cups.
Step 5: Cleaning and Long-Term Care
After brewing, empty the teapot immediately. Rinse it with warm water to remove wet tea leaves. Avoid using soap on the teapot if you want to preserve the natural aroma of the tea over time; however, if you brew different types of tea, a gentle wash is advisable to prevent flavor crossover. Never leave the teapot closed while it is still
Leave a Reply